I just have a quick finish for this week. This lovely bee block for Leigh. I am in love with every single fabric she sent. Especially the pearl bracelets!

{not a tutorial} photo tip - how I take pictures, sometimes.
I don't pretend to be an excellent photographer, but I am trying to get better. And learn how to use the little bit of light I do have to my advantage. I wanted to show you something I learned about taking pictures during Vanessa's class at the Sewing Summit.
White foam board and poster board can really reflect your natural light well so that you can get a nice bright picture before you process it. So here's a zoom out of that picture up there.
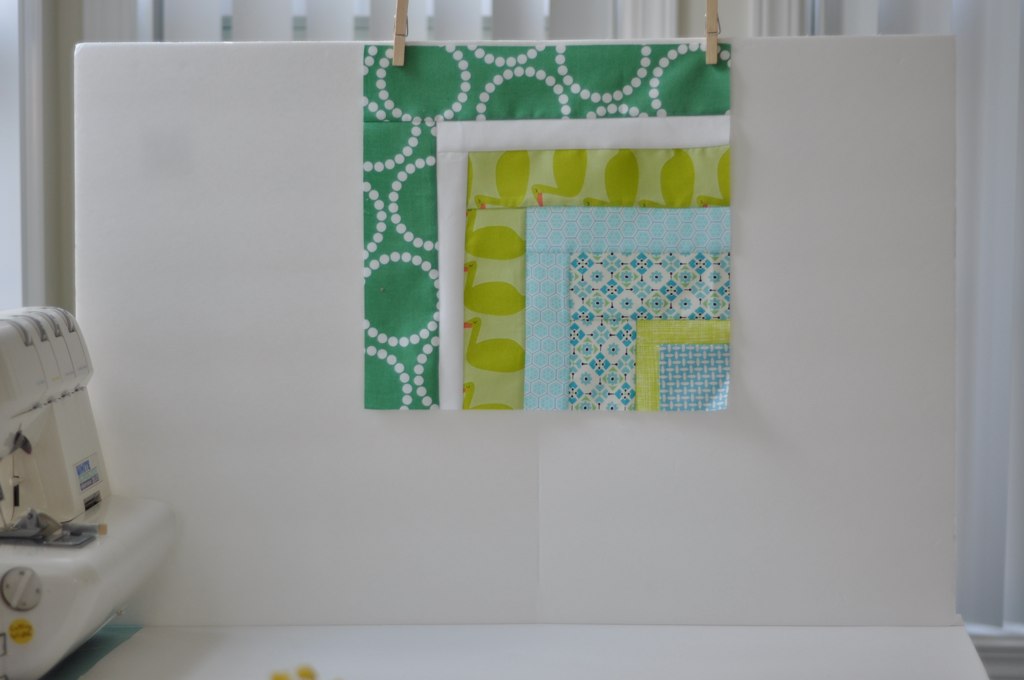
The block is clothes pinned to the foam board, poster board on the table and light coming from the window to the left. I took this picture in the late afternoon yesterday. Zoom out again...

The room was actually kind of dark, but with that light reflecting on the white and getting up close and personal I was able to get a relatively bright picture. I didn't edit these at all post photo-taking. And didn't use a flash. In retrospect, I probably would have lightened them up a bit more, but I wanted to just show you how a some cheap white poster board can help you take advantage of some natural light. I haven't gotten around to making an actual light box yet...

Linky Rules. Please follow along for a fun party!
1. Please write the post for sew & tell - or add a blurb mentioning sew & tell to a post written since the last sew & tell. If you are linking to a post with your own tutorial, please make sure it was a finish from this week and that the completed project is shown first.
2. One linky per person. (please put multiple projects in one post.)
3. Link to your specific post. (See here for permalink instructions - or email me.)
4. Link back here with a link or a button (HTML on my sidebar).
5. Be sure to visit and leave comments on other's posts!Please put your (blog)name instead of your project name, it helps us get to know each other better!
8 crafty mcCrafters commented:
Thanks for the photo tip..I never would've thought of it! We've had plenty of cloudy days recently and this would've come in handy.
Thanks for the great tip! I live in South Florida where sunshine is (usually) plentiful, yet I still can't seem to get decent quality photos -- they're either too bright or too dark. I'm definitely going to try what you have suggested on your {not a} tutorial.
Love your bee block and the photography tip is great! I am adding poster board to my list right now! Hope you have a delightful Friday! Smiles~Beth
Love it! It looks great in the natural light too!
Thanks for sharing the tip! It is truly amazing how good a photo can look with a little bit of playing with the background. Even in a dark room.
thanks for the tip, I love these colors.
Thanks for showing us your great tip! I learned so much from Vanessa's class at Sewing Summit that has improved my picture taking... (a new camera helps!) ...using natural light is a biggie. My favorite tip of hers: how to stand so you look skinny! Next step: getting a picture of the quilt straight on instead of the angled "on the floor" shot...
I can always use photo tips! Super cute block!!!!
Post a Comment