
(here's my moments shot for you - see how the bottom foot and a half isn't really decorated... I have two small kids, need I say more?)
I was unexpectedly at Joann's last week and saw the red felt and though - hmmm, how could I do this? It was a 72" wide bolt, so I decided to buy 2 yards so I would have a curso de marketing digital. I figured the least I could do would be wrap it haphazardly around the tree.I've been mulling it over in my head all week what to do. And once I figured out what I wanted to do and maybe how to do it, I was excited to get it done. And there was no sewing involved - it's so easy! But, the best part? The felt cost me $10 and it took about 10 minutes to cut it up!
I figured I'd better get busy, since today is the last day to link up with Natalia's Homespun Holidays!

So while my husband was watching a football game I went to work.
Supplies:
72" square piece of flannel
Dissapearing ink pen/chalk
String
Can, bowl, plate, or something else circular
Scissors
Embellishments
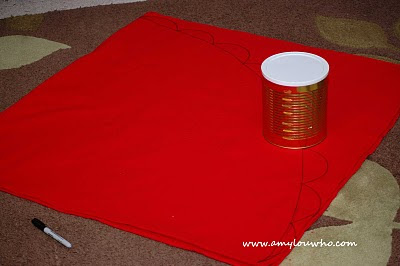
1. I took my felt and folded it in fourths. I marked the center with a curve using my #10 can. This way I will have a bit of a hole for the skirt to wrap around the trunk - you can eyeball this to match you tree/stand.
2. Next, grab your disappearing ink pen or chalk (I used a sharpie so you can see it). Tie your marker to a string. Get the cute guy watching football on the couch to hold the string firmly in the corner (during a commercial) so you can trace an even curve from the bottom right corner to its kitty corner.
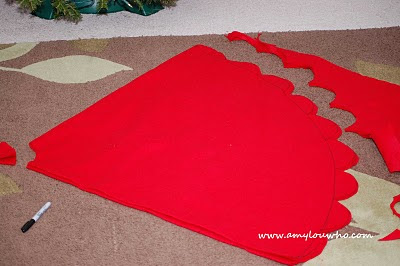
It should then look like this!
3. Next, take your circle template and trace a scallop design along the circle edge. I probably could have made my scallops a little bigger, but I like it.
4. Then cut along your cutting lines: center circle (on left) and scalloped edge.
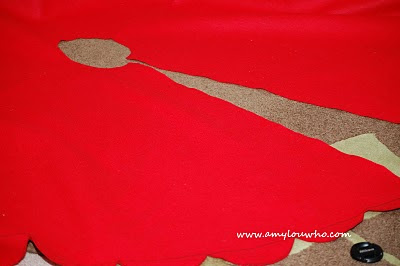
5. Finally, unfold your circle (isn't it cool?) and cut along one of the fold lines to the center. I picked the least pretty edge, since this will be in the back. I can put the sharpie side down and my prettiest scallops are in the front.
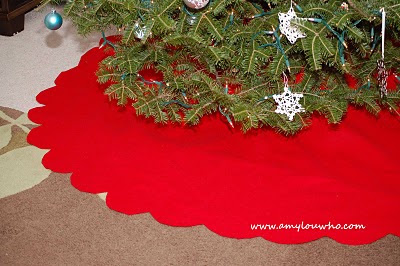
6. Lay it under your tree and see how it looks!
I think this would be cute with ric rac, pom poms, sequins, little trees and birds. . . oh, the possibilities! I have plans to embellish mine with snowflakes. I'm hoping it will look something like this (these are foam snowflakes from the dollar store):
Maybe next year.
If you make one - I'd love to see it! You can add it to my Flickr tutorial group!
13 crafty mcCrafters commented:
Oh a tree skirt was on my list but oh well...maybe next year. I'll have to remember your tutorial for next year! Happy Holidays Amy! (p.s. I have a question about blogging templates that I wanted to ask you but couldn't find your e-mail, so maybe after the holidays I could ask you about that?:) )
Very cute! I love how simple it is!
VERY nice!! I have a felt one too, but it's about 20 years old with tacky gold rickrack around the edge. Maybe next year I'll make another.
Cute! But I am confused, did you put the snowflakes on it or not?
That turned out fabulous!!! Great idea!
Great tutorial! I linked to your project on Craft Gossip Sewing:
http://sewing.craftgossip.com/tutorial-no-sew-christmas-tree-skirt-with-scalloped-edges/2009/12/23/
--Anne
I LOVE this! Great job :) So so cute and simple! Those snowflakes photographed really well too!
excellent use for that food storage. it turned out adorably, of course. yay for random lunch dates!!!
Amy, so cute and fun looking! Great tutorial!
Awesome! Sometimes simple is good!
72" wide felt? Hmmm . . . the wheels are starting to turn.
This tree skirt is adorable - and such a brilliant idea. Way to go.
Also, I love your #10 food storage can. :)
So cute and totally creative and quickie project! It totally transforms the tree into something magical and beautiful! Fabulous tutorial too! Thanks! Happy Christmas and Happy New Years!
i love that!!!! can't wait to see you!!!!
Post a Comment